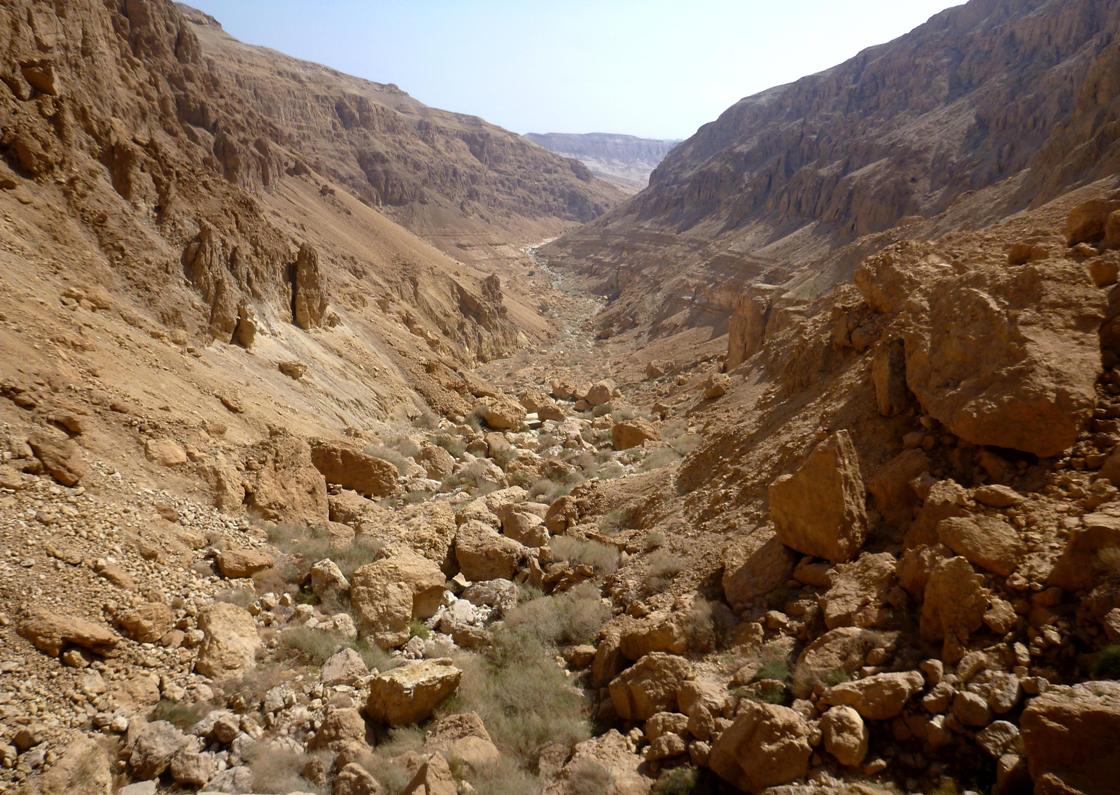
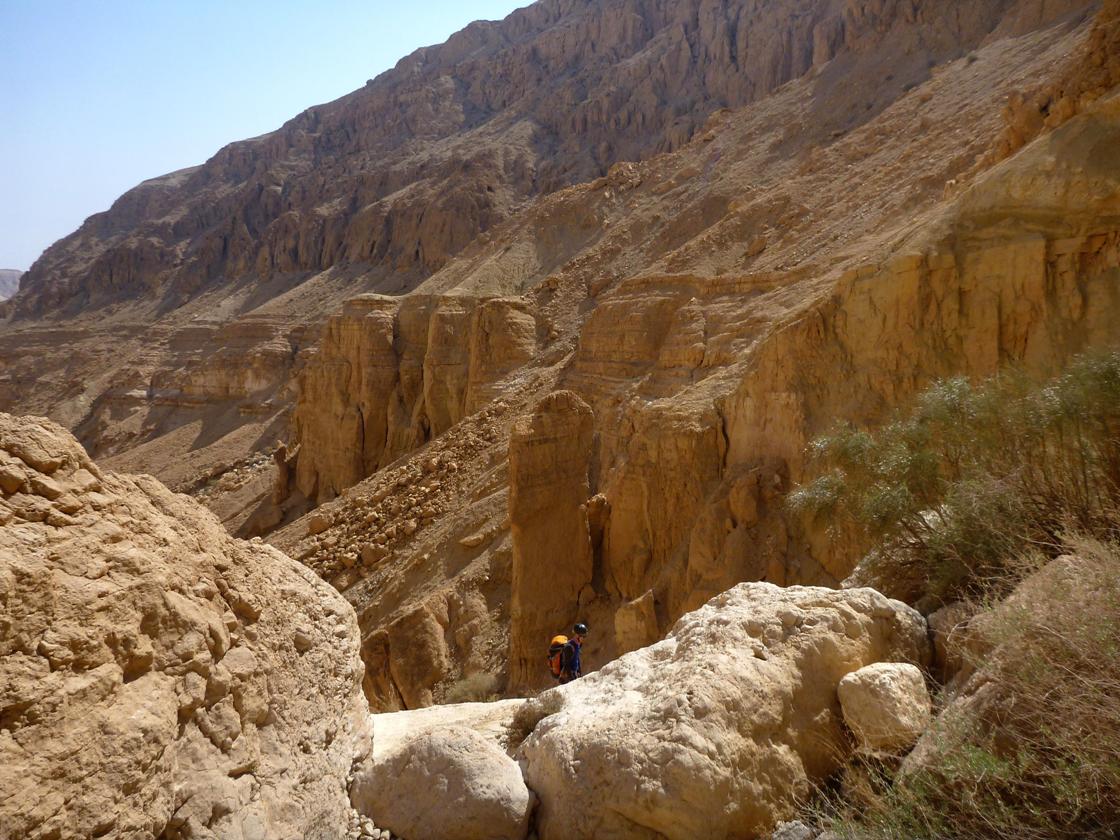
Nahal Peres
The 1st dry fall of nahal
Peres
The route type:
Long hiking route (partly marked) with a couple
of obligatory and another couple of avoidable rappells.
The route is obviously divided into two
parts: the upper canyon (there are no marked trails here and at list the first
rappelling is obligatory) and the lower canyon (there is a marked route
on the canyon floor with the exception of 1km patch in the very beginning; both
rappelling are not obligatory).
You can do either part or both of them. The following description refers to the
“full version”.
Keep in mind that the hiking route in lower part of nahal
Peres is highly popular, so be prepared for crowds and these terrible noisy
kids...
The canyon is dry all the year round
(with a possible exception of some pits just before the second rappelling
station) but be wary about floods during winter rains.
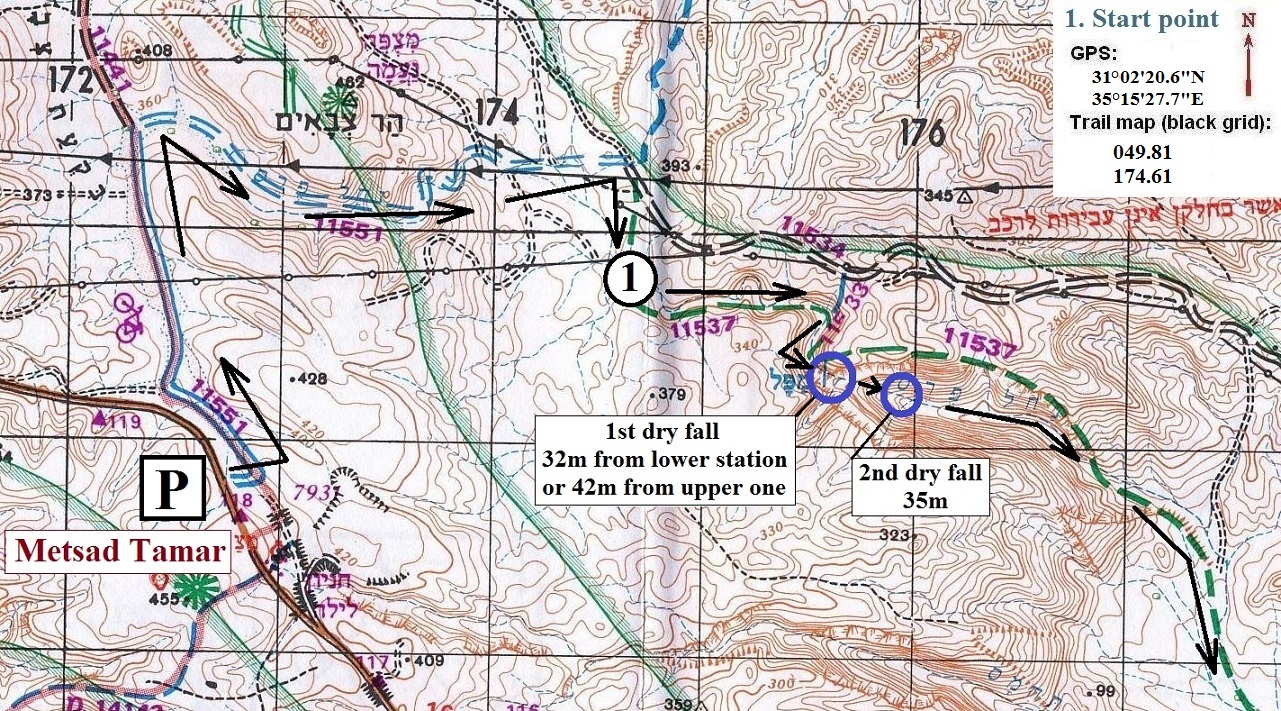
Getting there:
Drive on the road number 25 (Dimona – Tsomet Arava) till the sign “Metsad
Tamar” (watch “118km” road distance mark as well).
Turn from the main road as to “Metsad Tamar” and park
your car (if you are not concerned about the possibility of car thefts you can
continue farther on the dirt road marked with blue and “Israel Trail” marks,
but I would not recommend it). It will be a good idea to put the second car at
the petrol station after Tzomet Arava
junction in the direction of Eilat as it is safe
location and it is close to the end of the route.
From Metsad
Tamar parking spot the most obvious but long option is to follow marked routes:
11551 (blue marks) and then 11537 (green marks) which brings you to the upper
canyon of nahal Peres. Instead we decided to cross
the terrain with no trails keeping to point
1, that I choose as a “Start point” of the route because it is the last
place where you can get easily into the canyon: the canyon deepens
significantly after this point.
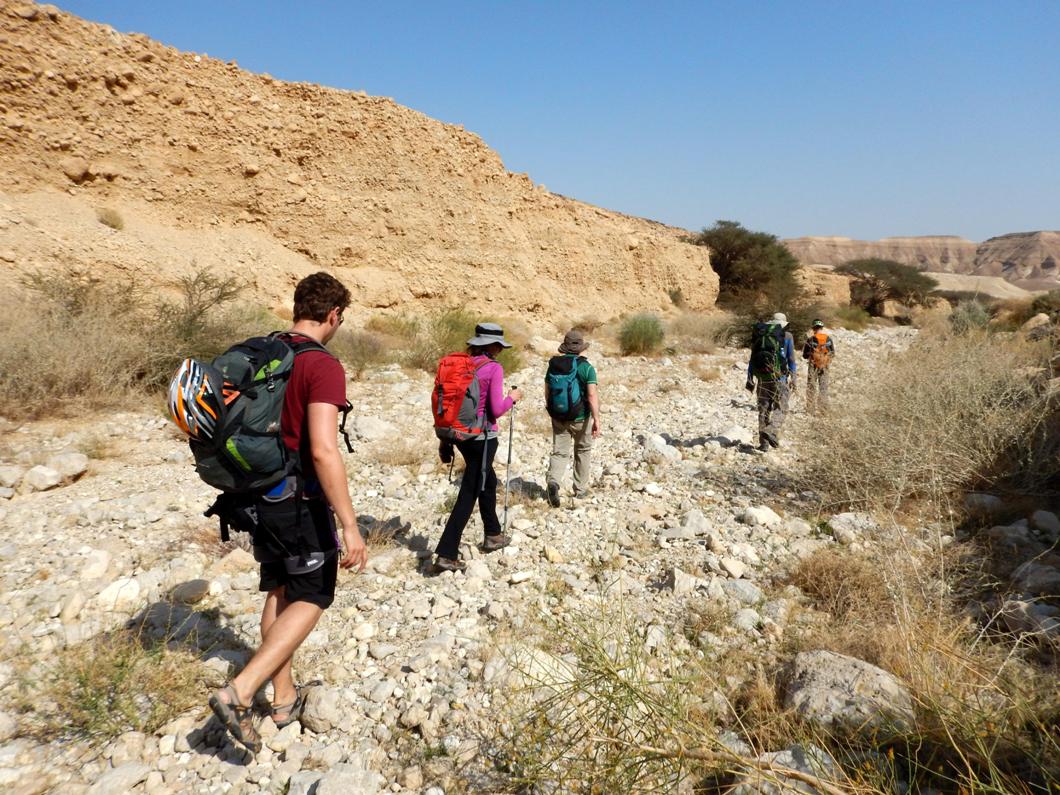
Once on the canyon floor, follow the “green trail” till the place where it
starts to climb up on the left wall. Leave the trail and proceed farther down
the canyon. After 100m you will reach the 1st dry fall which must be
abseiled.
Provide 1.5-2.5 hours for approach depending on the chosen option.
|
|
Upper
canyon of nahal Peres
|
|
|
|
|
|
|
|
|
Lower
canyon of nahal Peres
|
|
|
|
|
|
|

Route description:
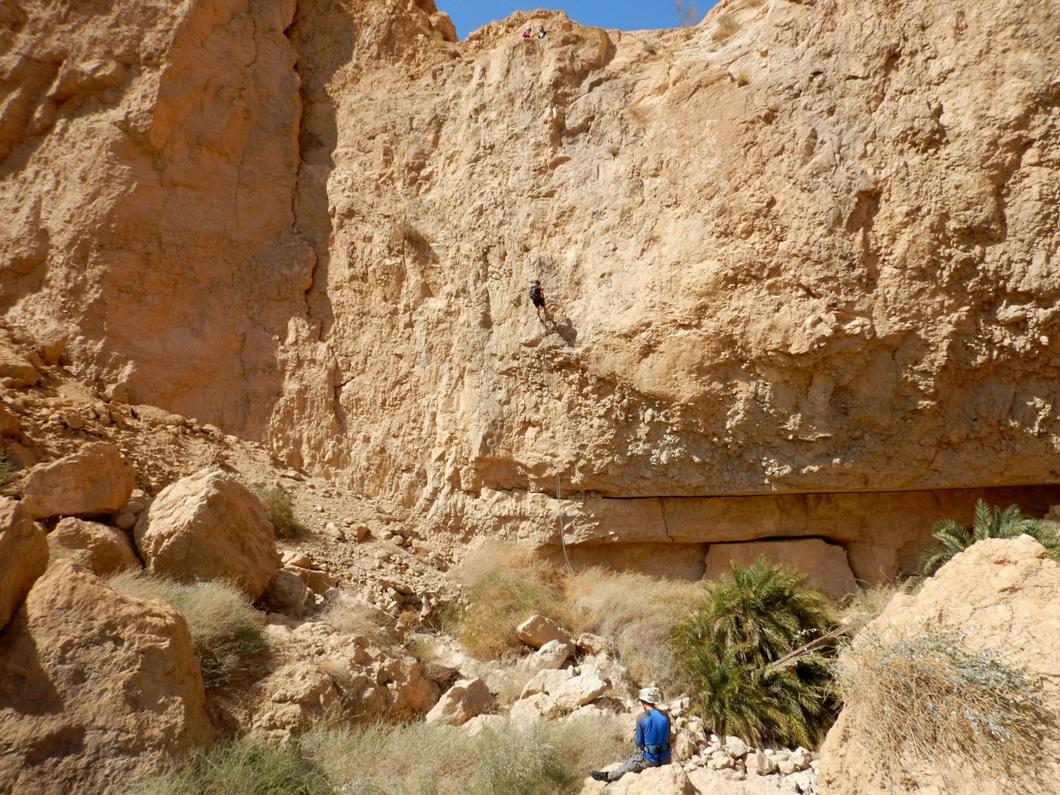
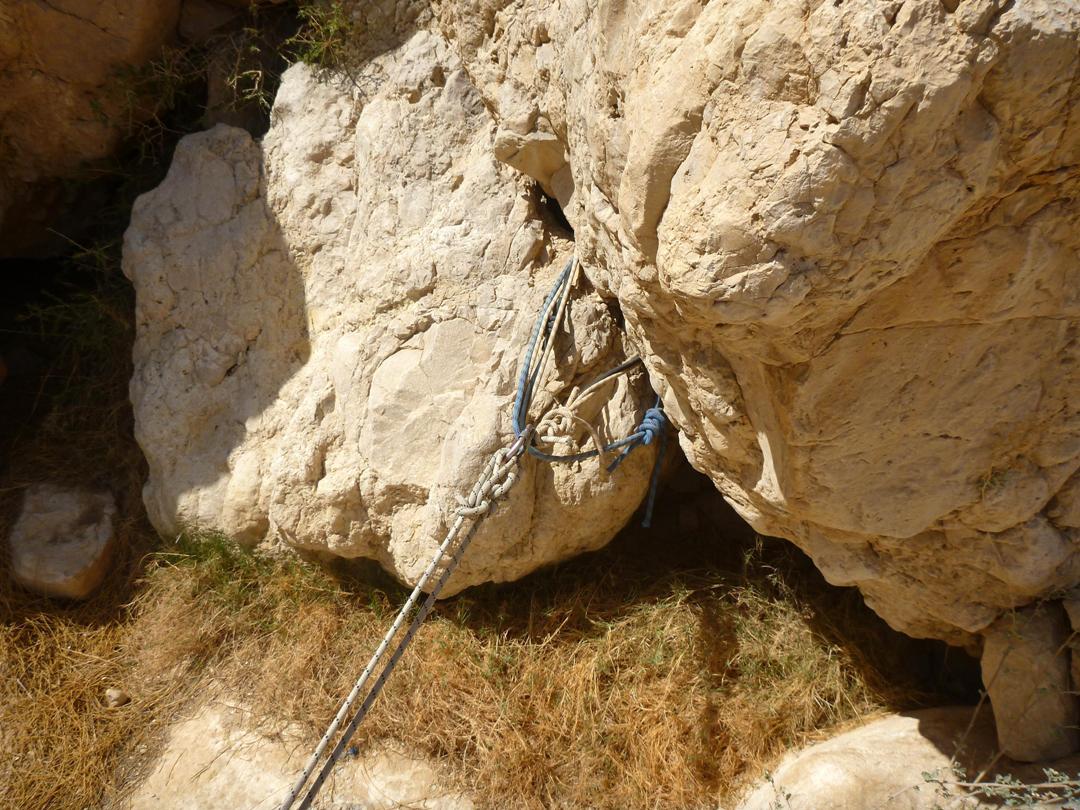
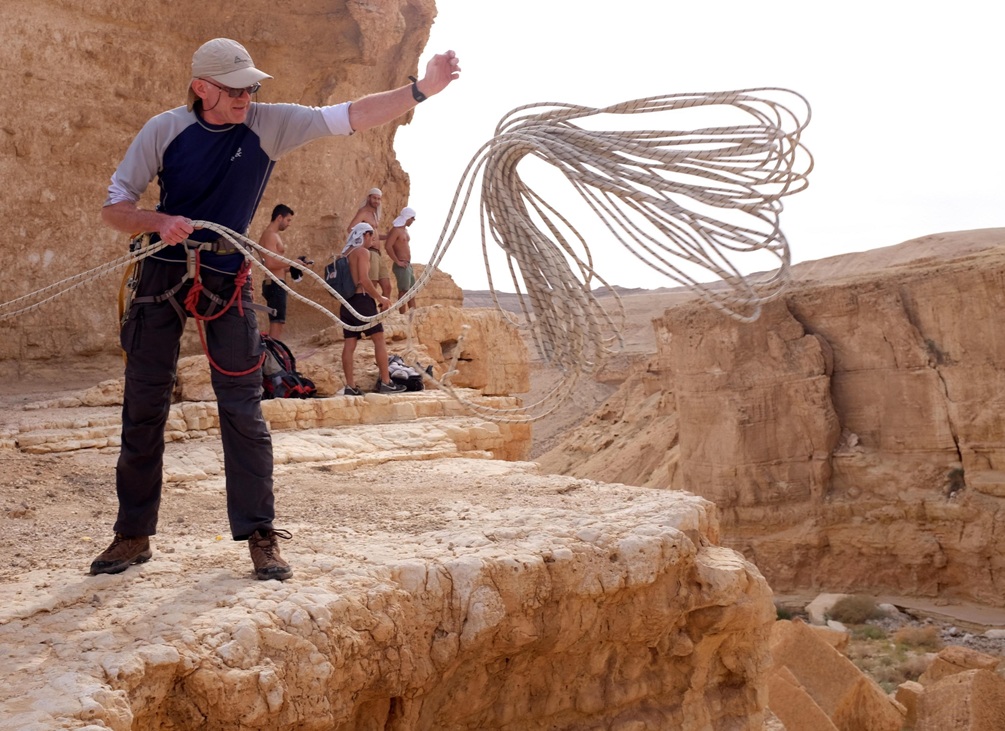
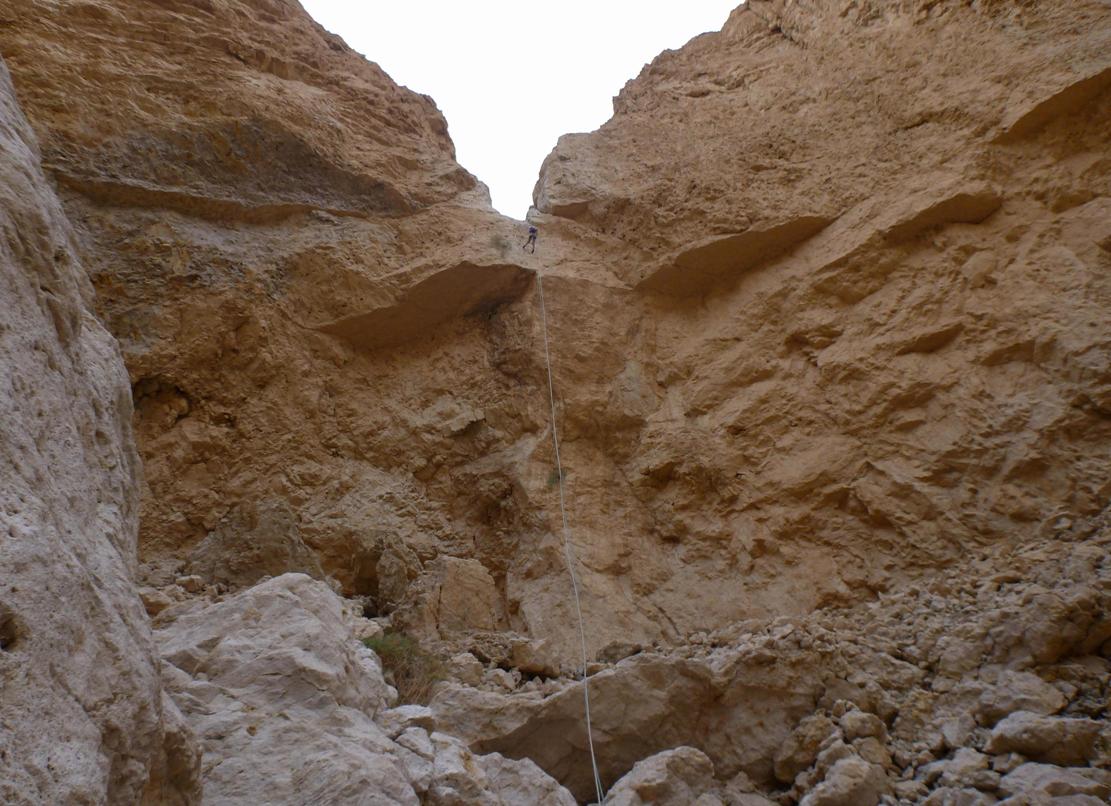
There are 3 to 4 dry falls that can be
abseiled:
1. 32m from the lower rappelling station or
40-45m from the upper one (mostly vertical, then last 10m - overhang)
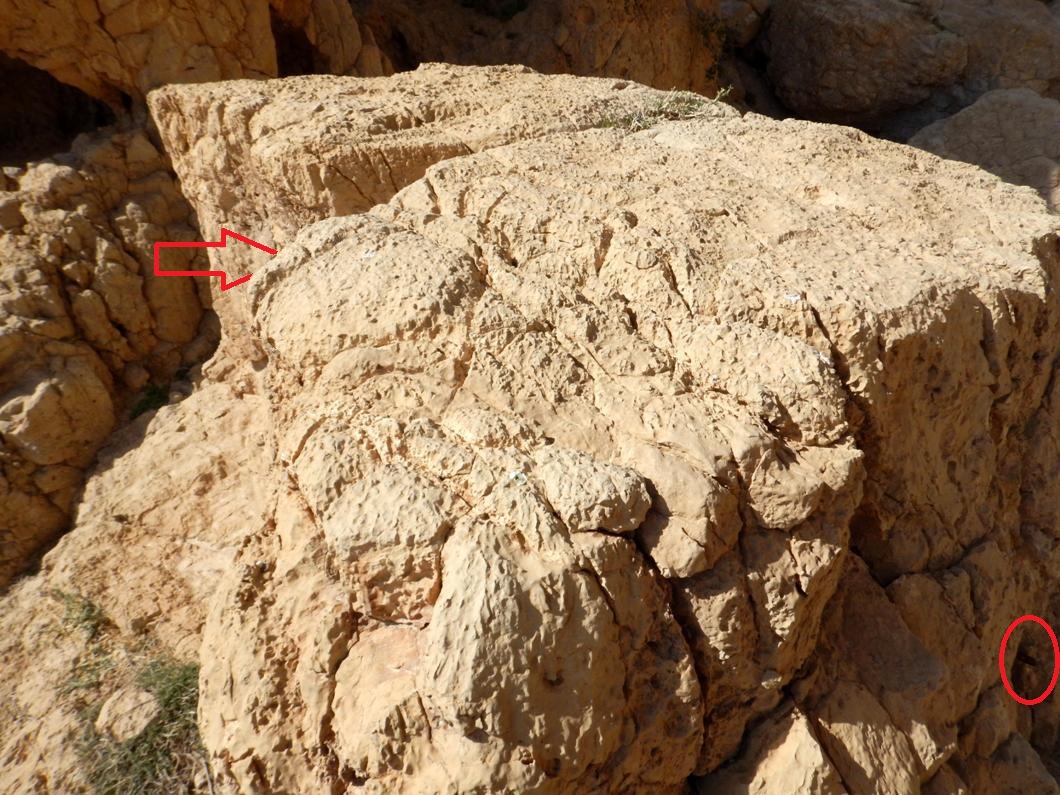
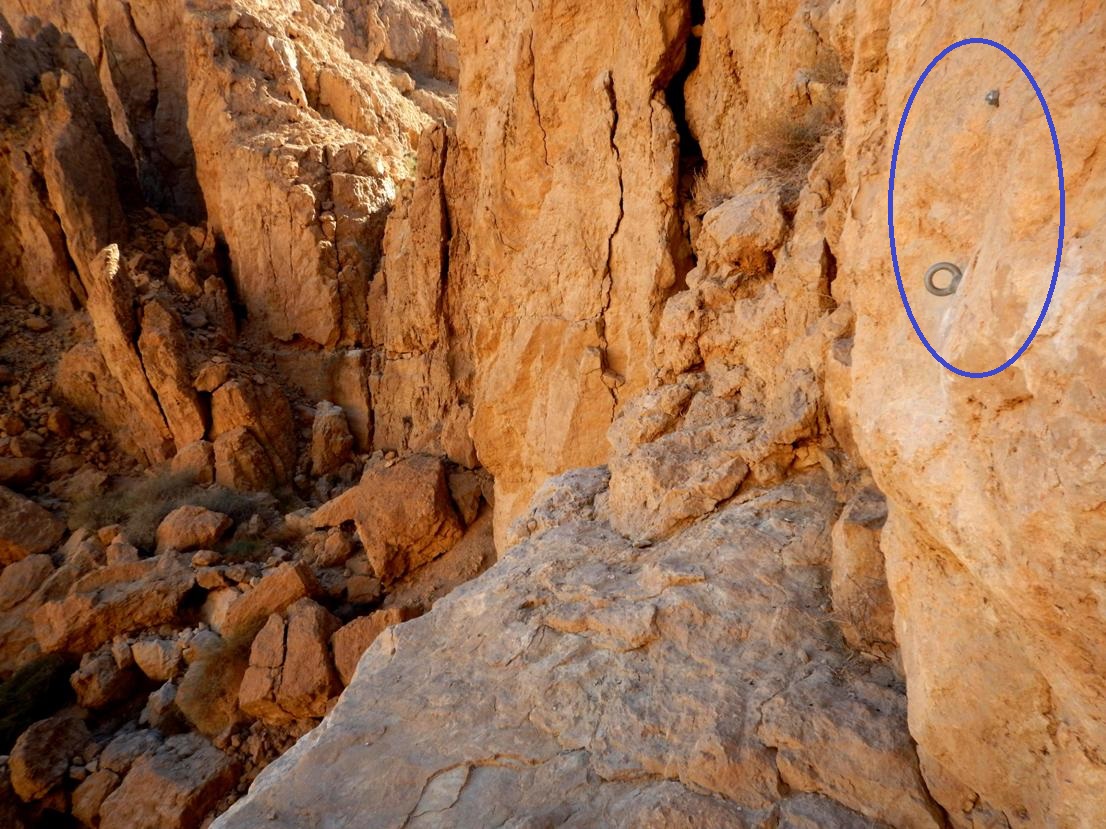
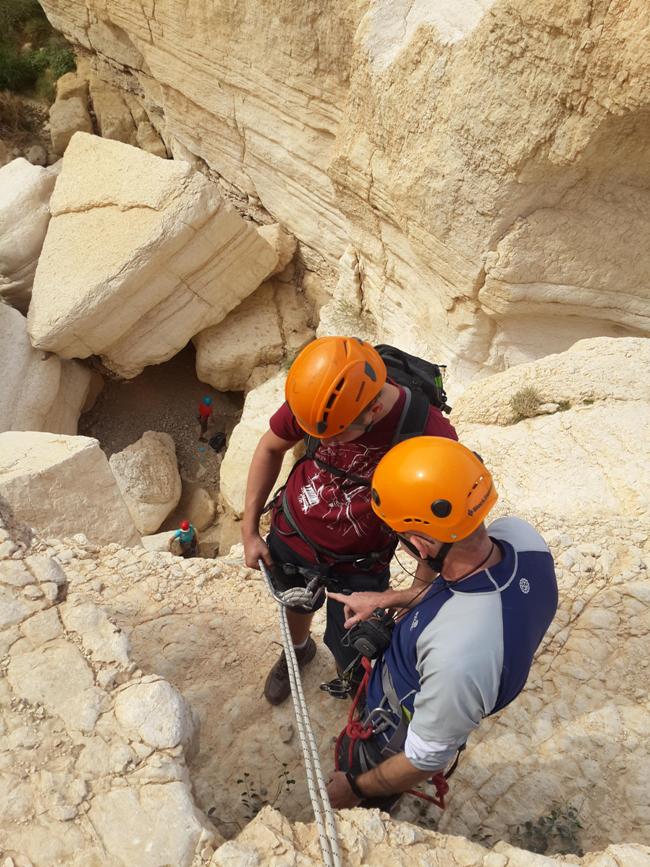
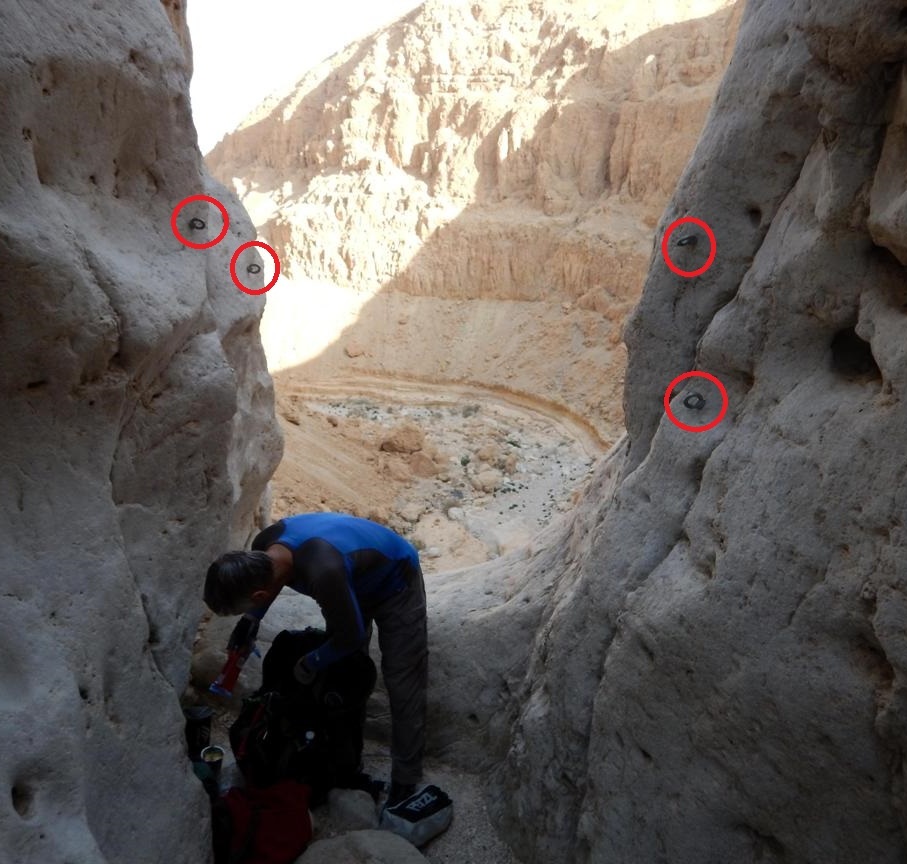
There are two rappelling spots: the upper
one - on a big block towering on the right side near the edge (red colored
signs on pic. 1-6) and the lower one - on a big ledge
below the mentioned “block” (blue colored signs on pic.
1-6).
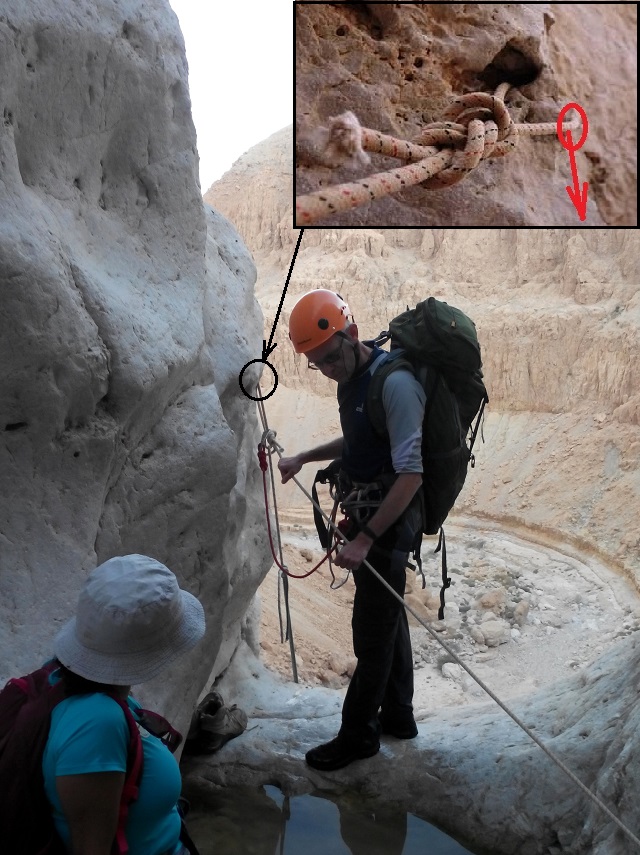
The upper station: The are two bolts (one with “ear” and one without it)
on the front face of the block (pic. 2,3) and one old
piton on the left face (pic. 1,2,4). There are cracks
suitable for the natural anchoring as well. *
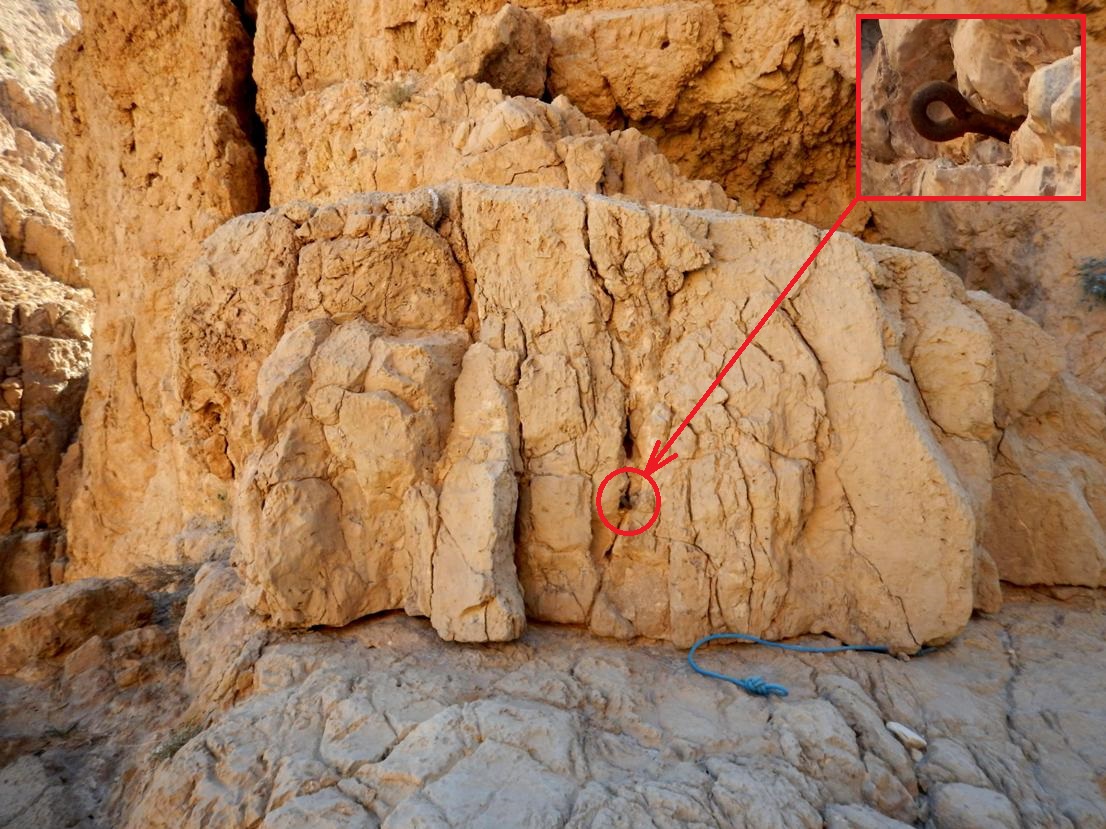
The lower station: In order to get to the lower station, scramble down
and traverse right to a big ledge (blue arrows on pic.
1). The are two bolts (12mm) here: one with “ear” and
one without it (pic. 5,6).
*
|
|
Pic 1. The 1st dry
fall rappelling stations |
|
Pic 2. The upper
rappelling station |
|
Pic 3. The bolts |
|
Pic 4. The old piton |


|
|
Pic 5. The lower
rappelling station |
|
Pic 6. The lower
rappelling station |
|
A view from the rappelling station |
|
|

|
|
The 1st dry fall |
|
|
|
|
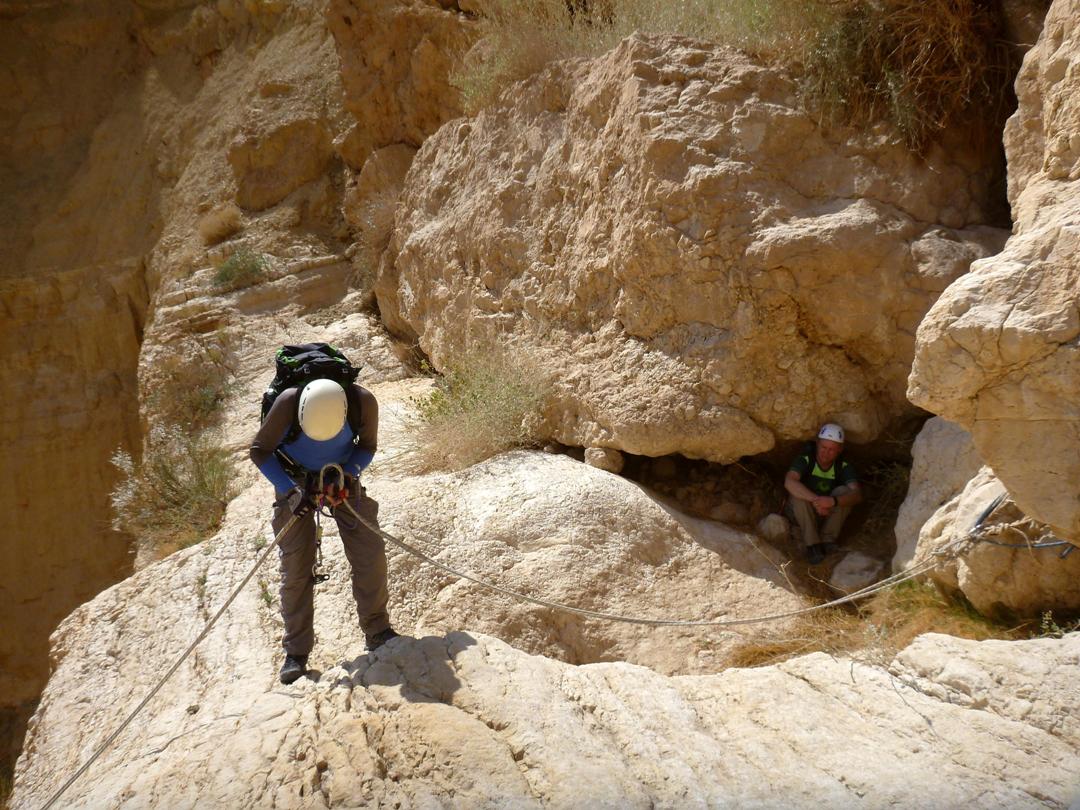
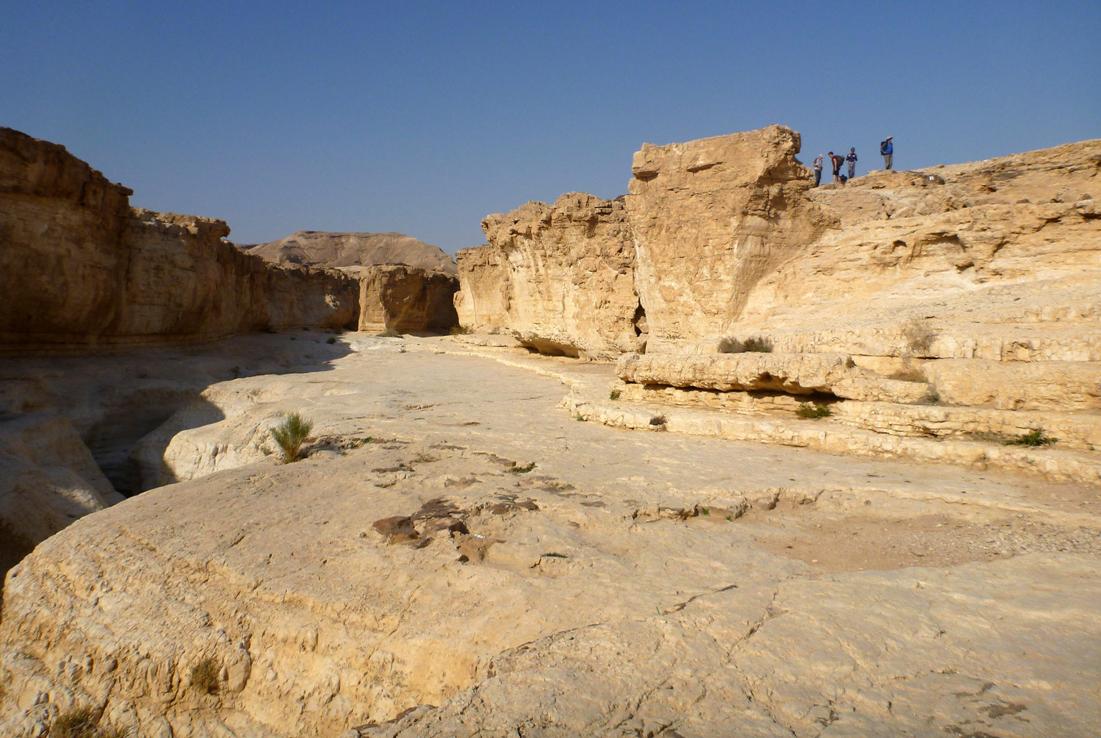
A 100m long bolder field separates the
base of the first dry fall from the second one:
|
|
Boulder field between the dry falls |
|
Approaching the 2nd dry fall |
|
|
|
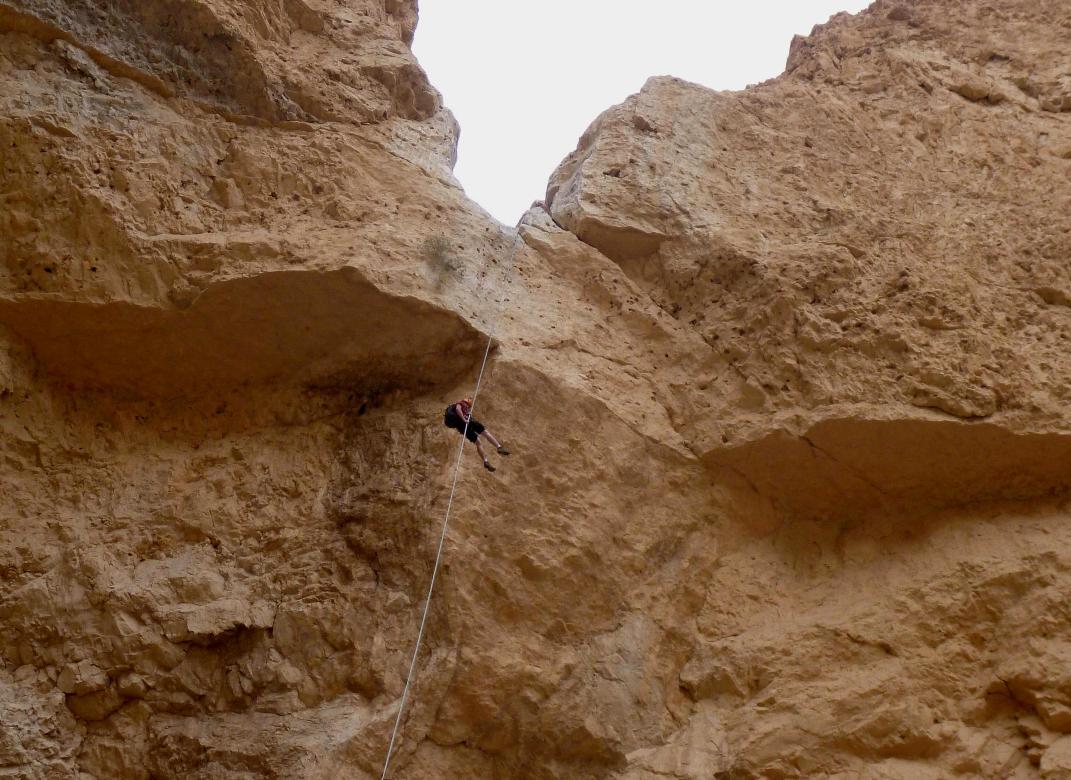
2.
35m (15m vertical, then overhang)
There are big boulders near the edge
which can be used for anchoring. Bring your own rope loops and a maillon. *
|
|
The 2nd dry fall rappelling station |
|
The 2nd dry fall rappelling station |
|
The 2nd dry fall |
|
|
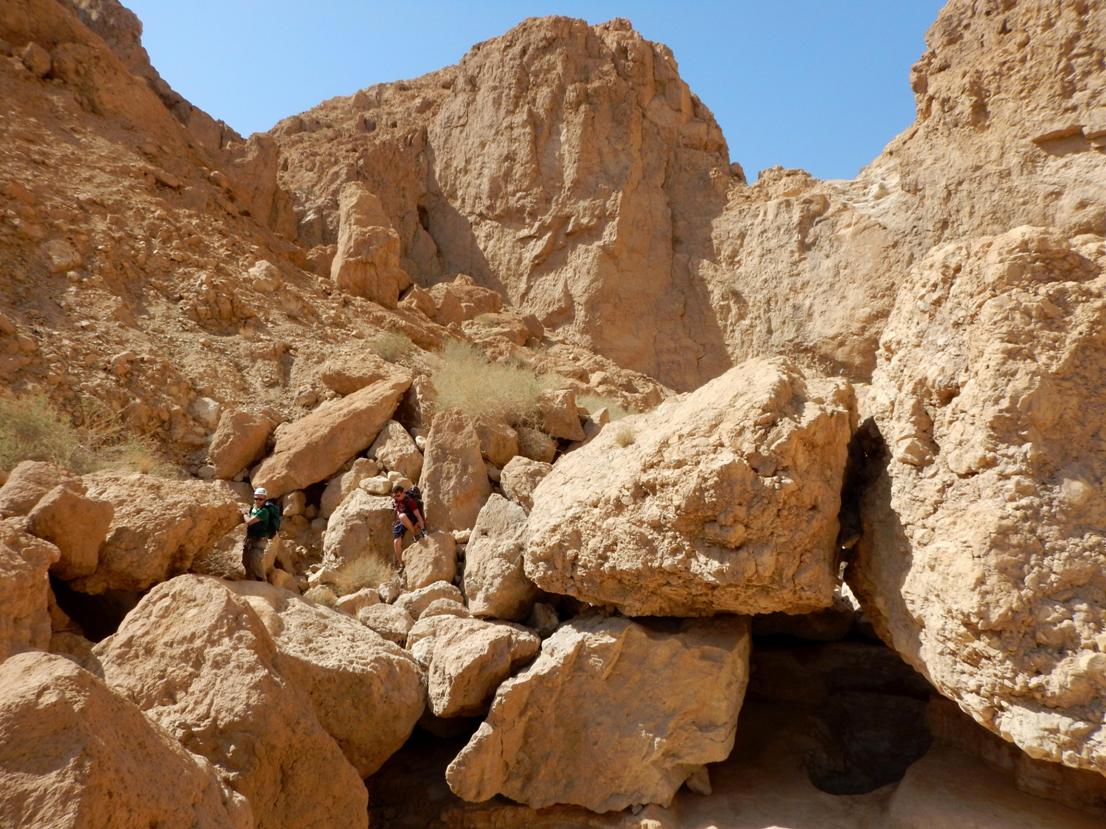
From the base of the second dry fall you
have to cross another 200m long big boulders field and then the terrain starts
to be much less rugged. Walk 800-900m more to the exit from the upper canyon
and join the “green trail”. From here follow green marks till the place named
"Gabei Peres" where numerous pits filled
with water are present. 3km of easy walking.
Just before coming to Gabei
Peres you cross the dirt road marked with red marks which allows you to exit
from the route (see trails map).
|
|
Walking to Gabei Peres |
|
Gabei Peres water
holes |
|
Gabei Peres water
holes |
|
|

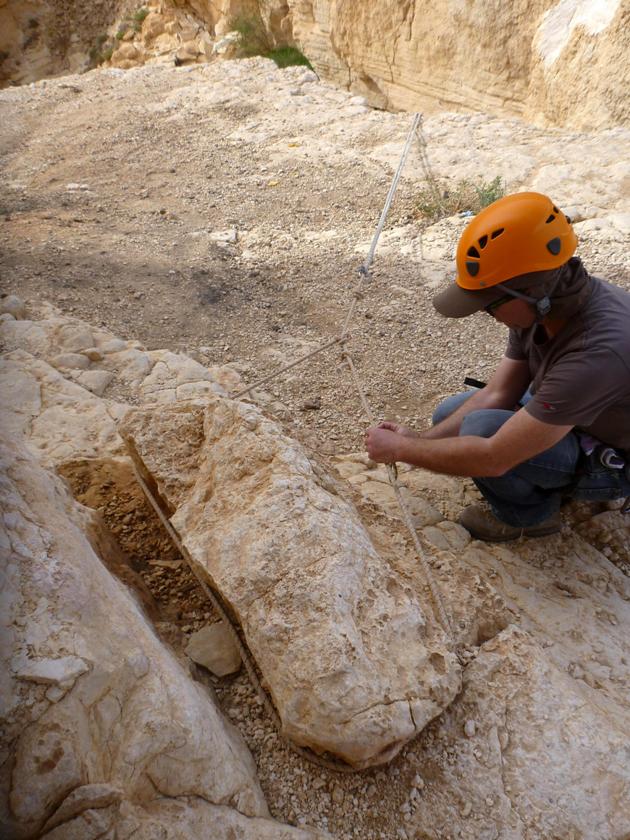
3.
15m (or even less) of stepped descent
Descend with a side trail that branches from the "green trail" and leads to
the water pits. Walk left along the central fissure till the U-shaped dry fall
and look for a relief features suitable to build a rappelling station.
Actually there is little to choose from
and we used some heavy boulder approx 3m from the edge.
There is a big and easily accessible
ledge at the beginning of the descent. It is convenient to begin to rappel from
this ledge.
12-15m long rope is enough to get to the scree slope and boulders at the foot of the fall.
|
|
The 3rd dry fall rappelling station |
|
|
|
|
|
|
|
|
Rappelling down the 3rd dry fall |
|
Rappelling down the 3rd dry fall |
|
|
|
|
Walk about 1km along the wide wadi till the junction of two trails (the "green"
trail, which just bypassed the 3rd dry fall, and a "black" trail,
which descends from the east bank) and then follow the black marks which will
lead you through the narrow channel of nahal Peres to
the 4th rappelling station.
|
|
Walking in the lower part of nahal
Peres |
|
|
|
|
|

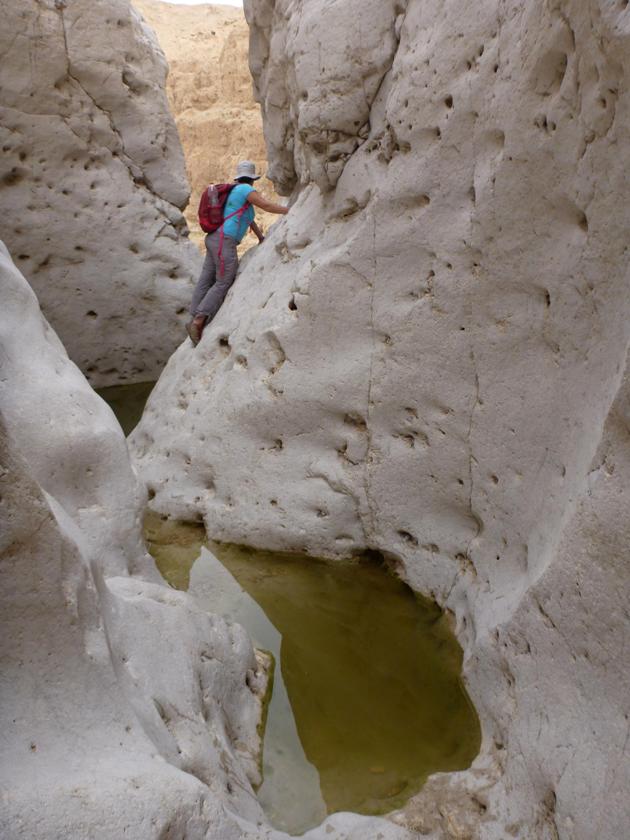
Eventually the "black" trail
turns right and climbs up steeply - out of the canyon. Leave it and follow
through a short chain of water pits (the deepest is waist-deep) to the very end
of the channel.
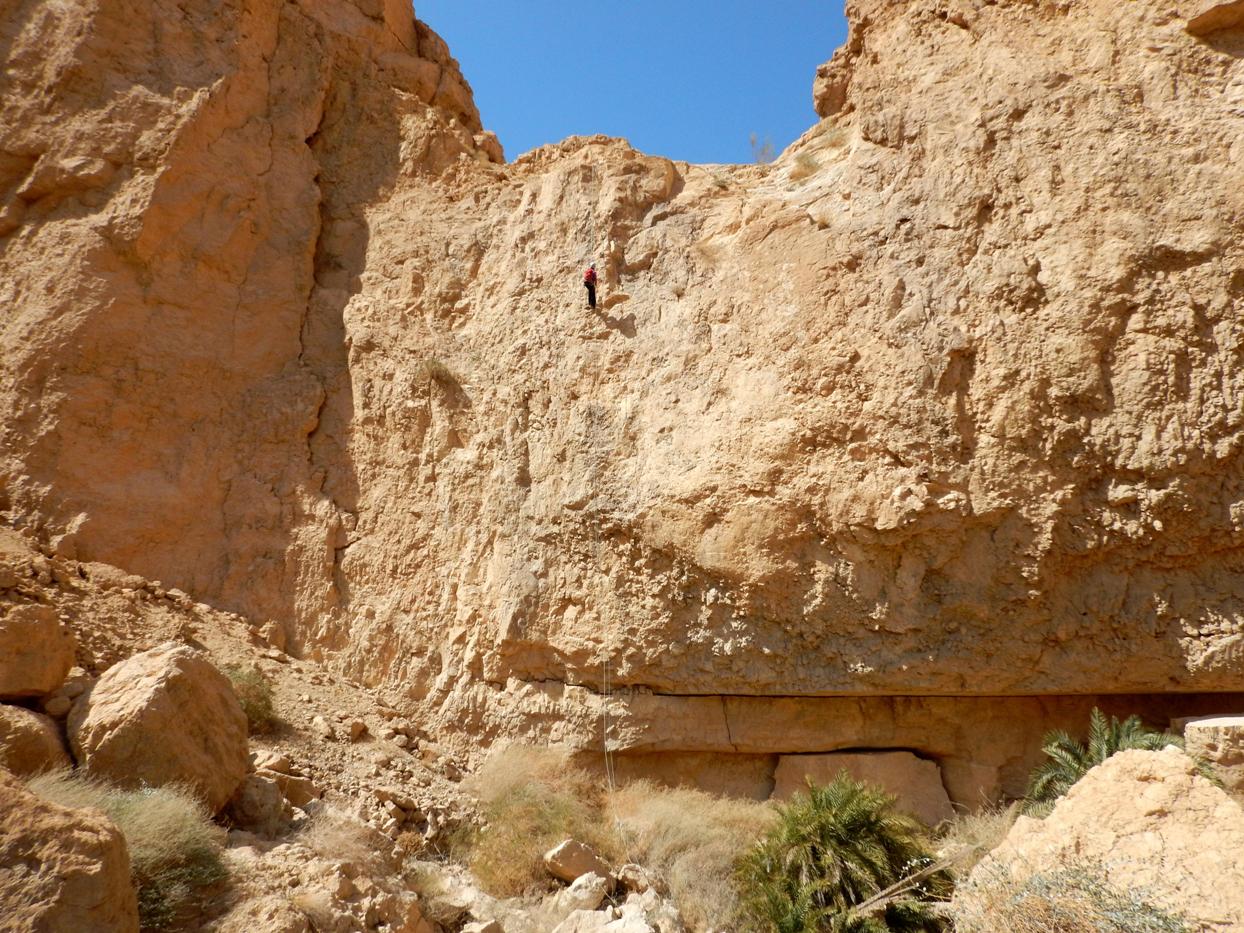
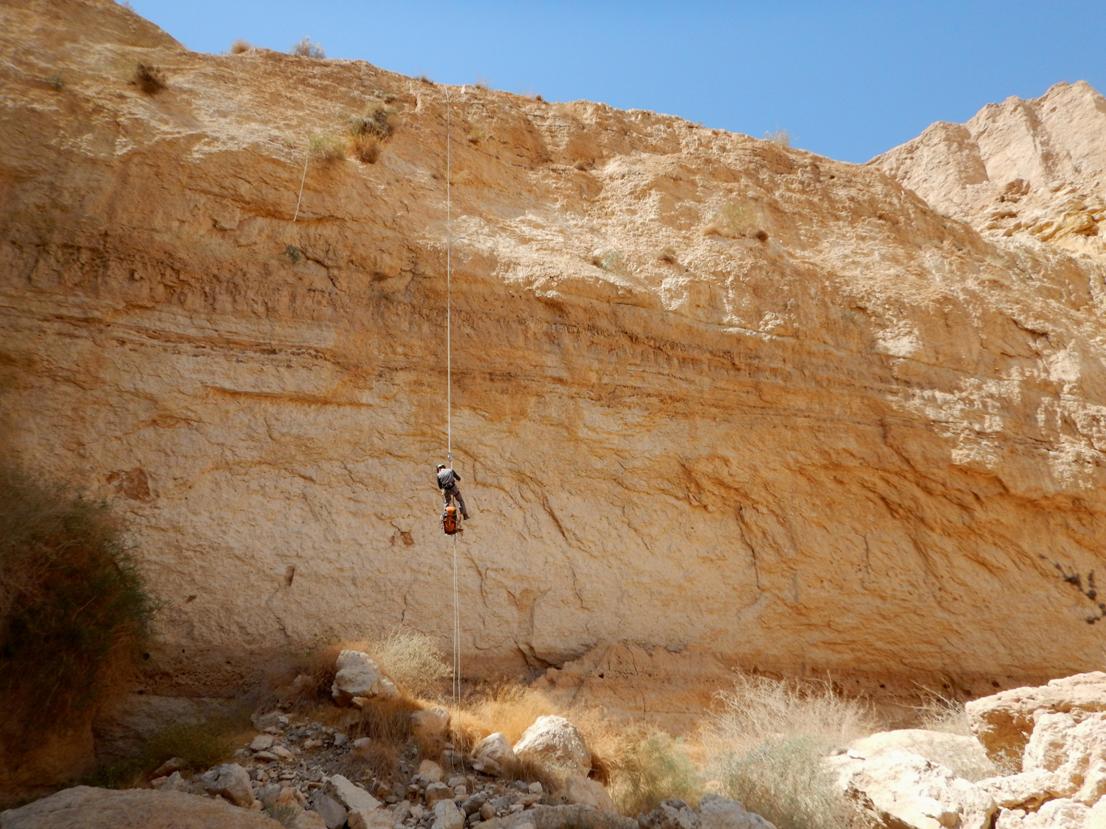
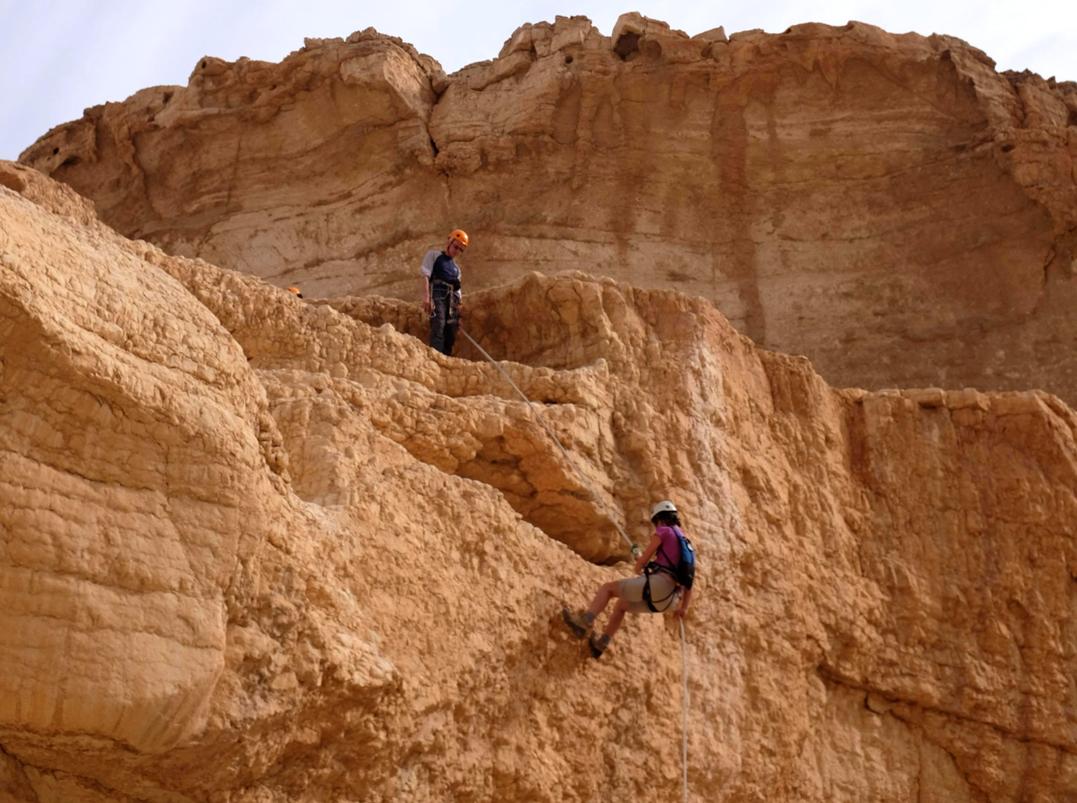
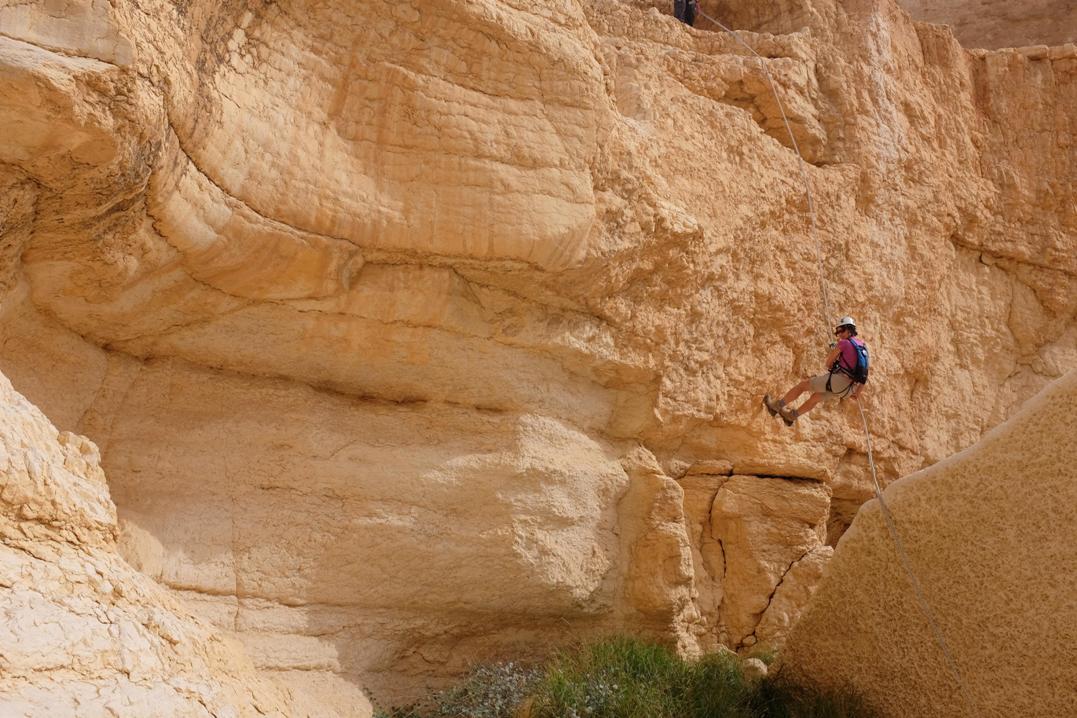
4.
40m (10m vertical, then overhang)
40m long rope is just enough to get to
the scree slope and boulders at the foot of the fall
but 60m long rope will bring you to the actual floor.
As on February 2017, there were 4
excellent bolts near the edge - one pair in each wall, - but keep in mind that
they may be removed at any time. For such a case there are some options to
place a natural protection, but they are scarce (to put it mildly…). Actually,
there is one good through hole at the height of the head near the edge. On the
other hand, there are some caverns in the canyon walls which are suitable for
eccentric anchors (tricams, hexes etc.).
|
|
Approaching the 4th rappelling station |
|
The 4th dry fall rappelling station |
|
An option for natural anchoring (through hole) |
|
|
|
|
Rappelling down the 4th dry fall |
|
Rappelling down the 4th dry fall |
|
|
|
|
From the foot of the dry fall you have to
follow the canyon bed for
***** - The only one of its kind. A "must
do" trip!
**** - Very interesting, highly recommended!
*** - Pretty nice
route.
** - Inexpressive
one.
*
- Do it if you have nothing to do...